4Runner Racks
While you have likely gathered that our passion lies with the Land Cruiser, the answer is yes, we can transfer what we’ve developed to also work on the 4Runner platform as well. Similar to the Lexus GX460/470 models, the 4Runner racks share similar features and attributes, adopting all of the unique style points we have developed, as well as retaining the ability to run all of our rack accessories. Everything that makes the racks we do a Gamiviti rack.
Expo Racks
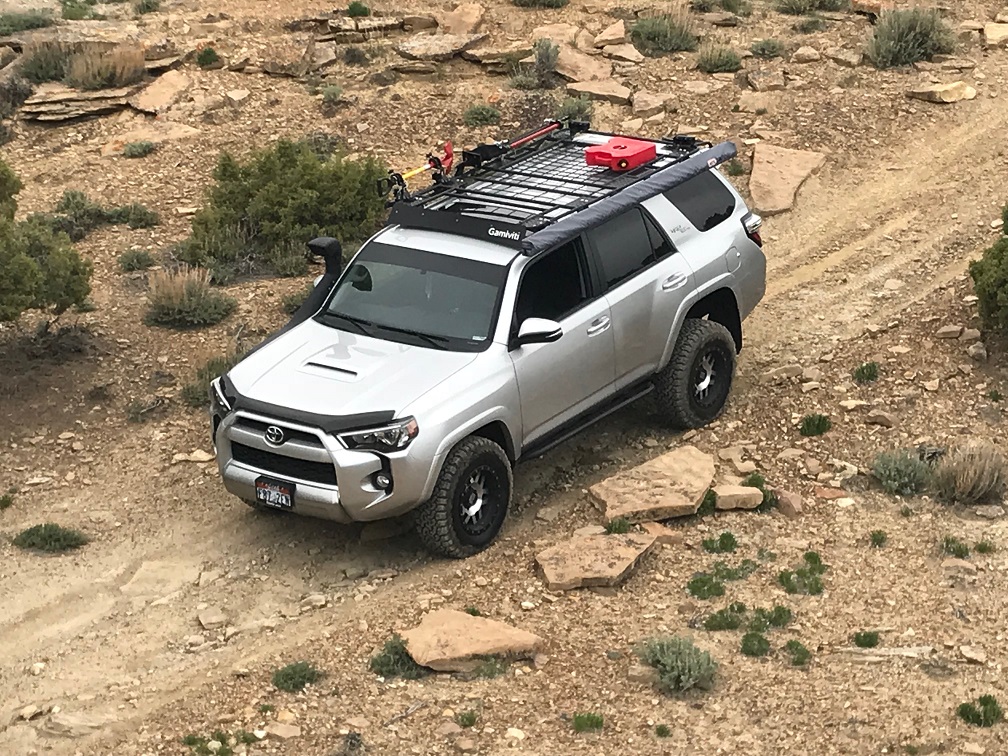
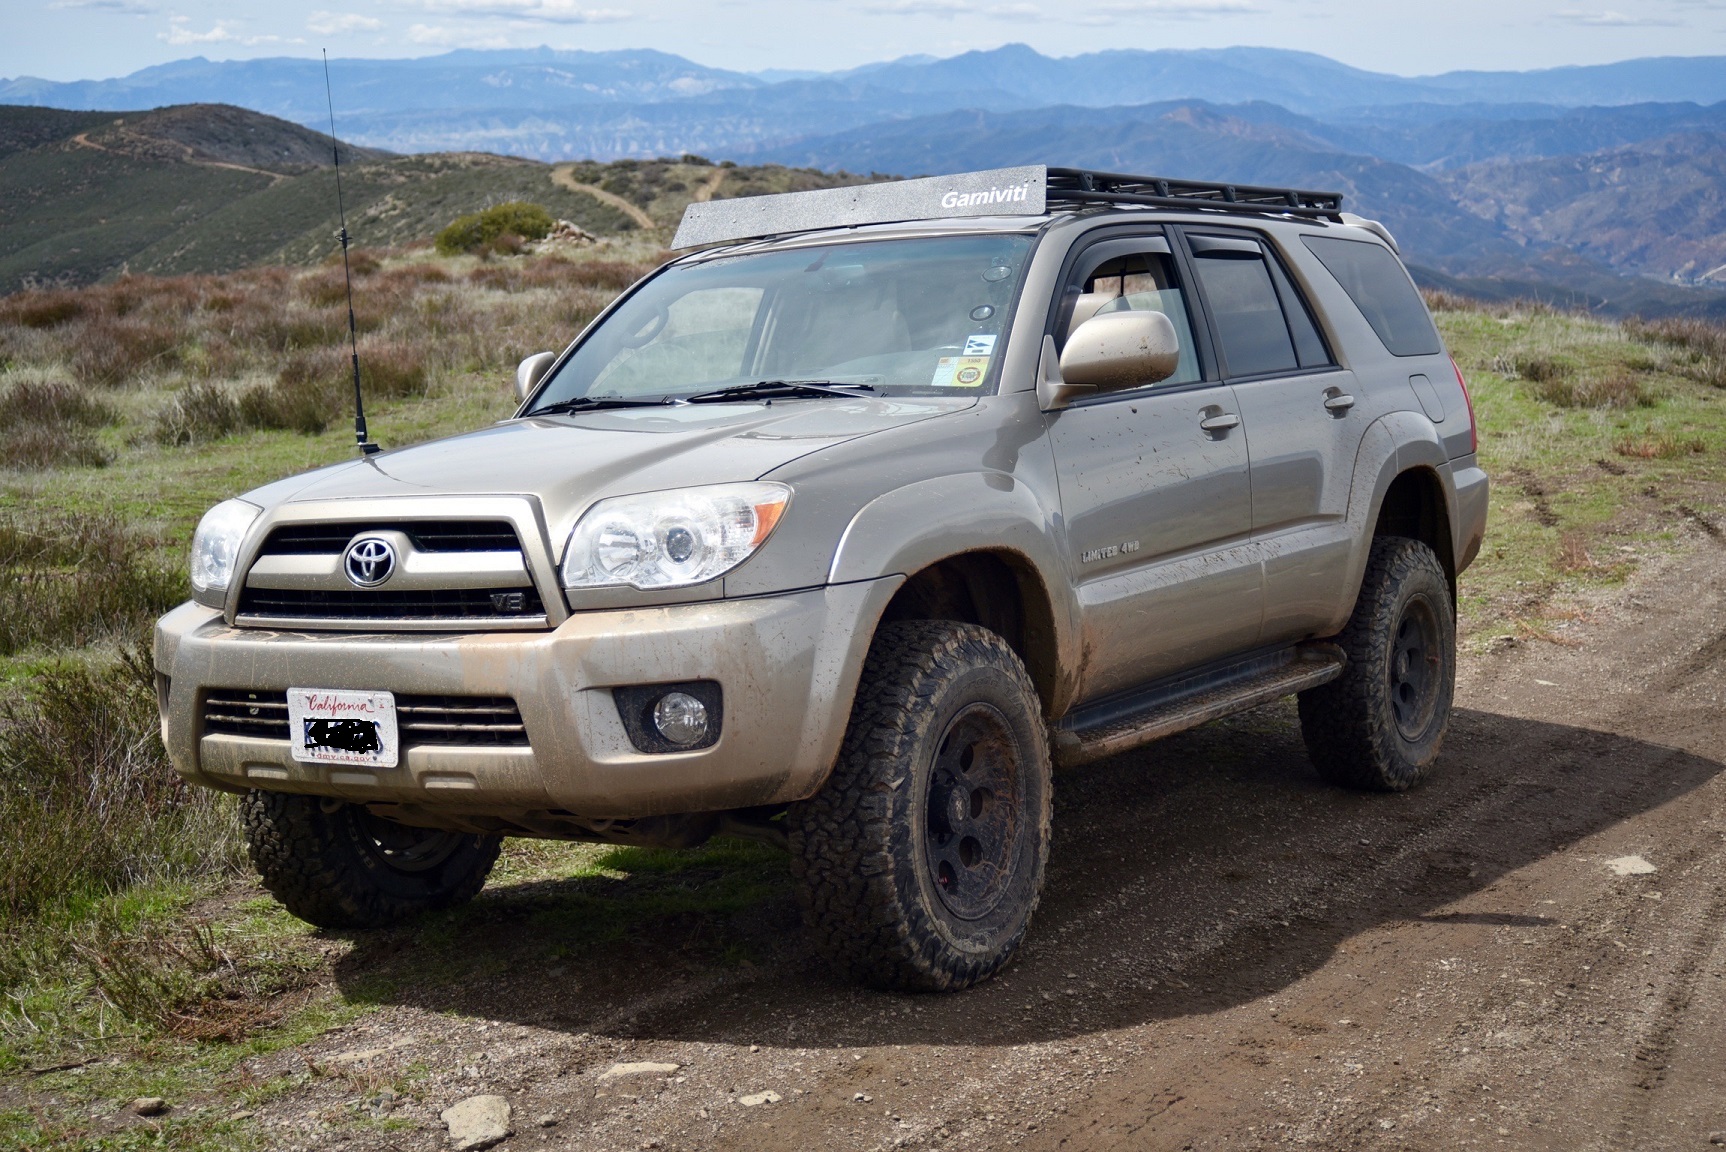
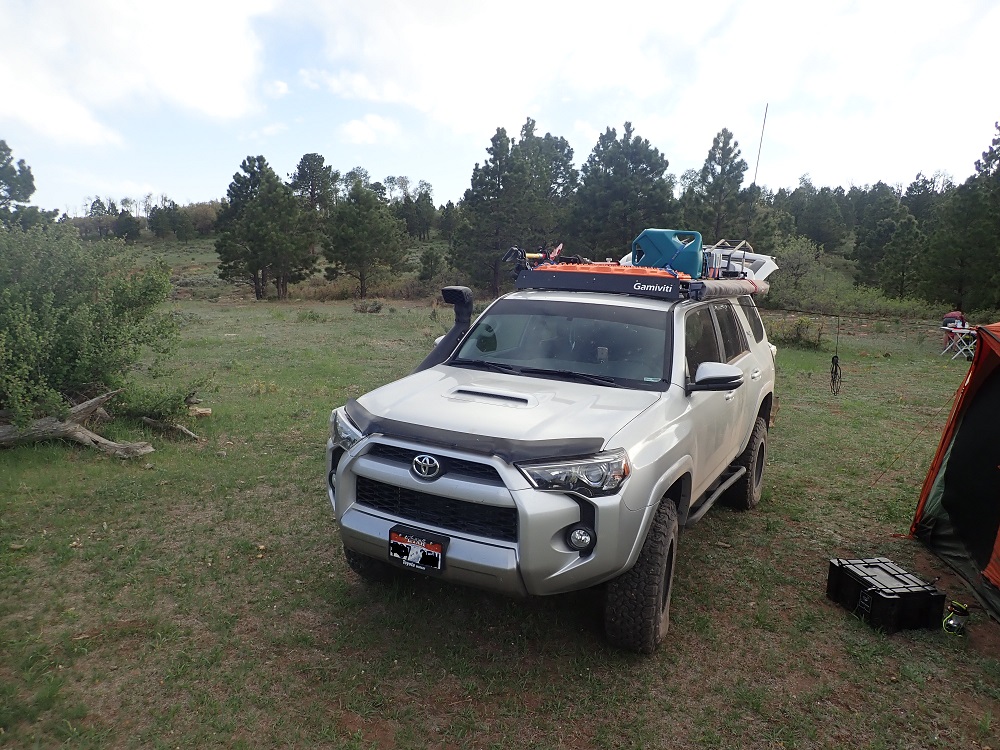
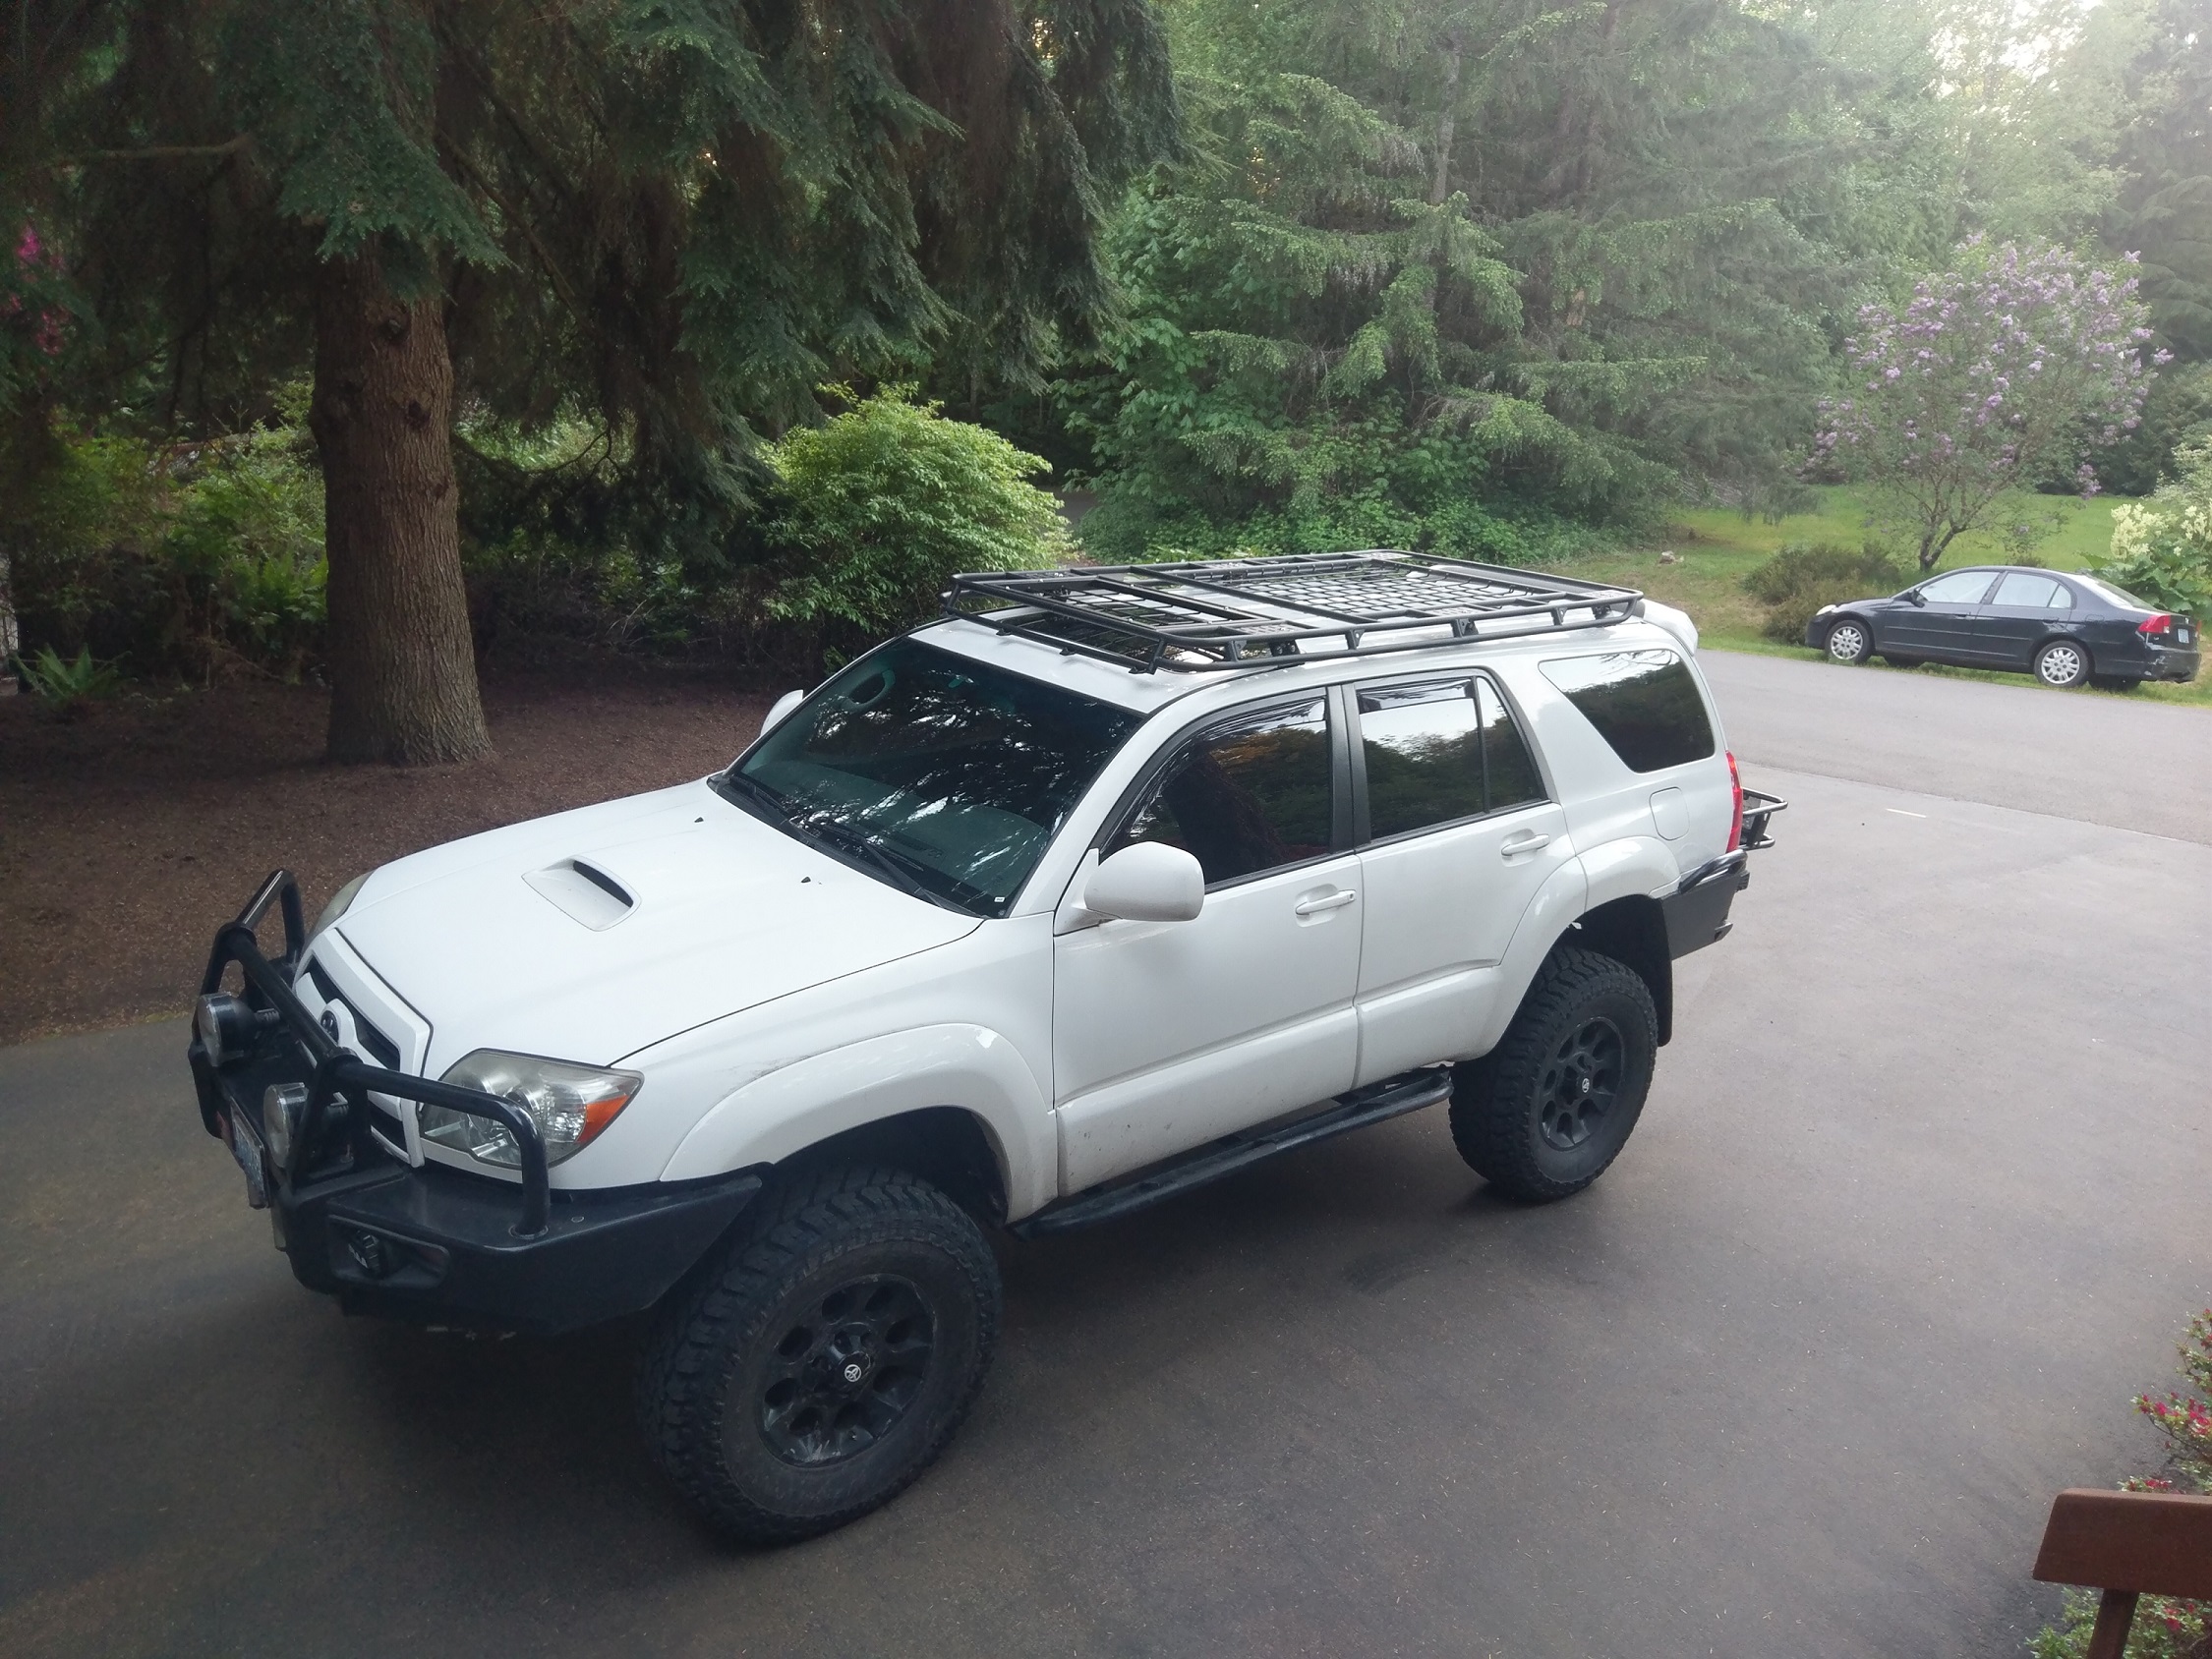
Our most popular model for the 4Runner is the Expo++ configuration, same features and benefits found on the Expo++ racks we make for Land Cruisers. We can make these for the 3rd, 4th, and 5th generation 4Runners. Below are a few pictures, more pictures can be found in our gallery page. Email for a quote and drawing.


To initiate an order for a 4th or 5th Generation Expo rack, simply send us an email and we’ll get right back to you. Lead times are generally 6-8 weeks.
5th gen short rack
in 2021 we launched a new style for the 5th generation 4Runner, which for lack of a better term we’ll call the Short Rack. This is a no-drill solution for light duty applications, as it will use the current mount locations that come stock on the 4Runner. There are however additional plates in the center of the rack, for adding a 3rd set of towers, which would help with the load carrying capacity of the rack considerably. As you’ll see throughout this site that decision is up to you- if you’re a “build it once, build it right” kind of guy then do the middle towers, if you’re a “let’s see how it goes first” person then forgo them to start.
From our experience, if your plan is to mount up some traction boards, small awning, random camping gear, maybe an occasional hardware store run, then you’re probably ok with just 2 towers per side. But if your intent is to put a tire up there, or run a RTT, 3 per side is definitely better. Our advice will always be to keep the weight on your rack as low as possible.


Our standard Short Rack configuration comes with 3 plates per side to run up to 3 towers, side Expo bars with gussets running down, rear and side light tabs, and powder coating. All of this can be custmized and configured differently, just contact us if you’d like to explore your options. And to get started on your build for a standard Short Rack, you can use the buttons below.
Like all of our rack packages, shipping is not included in the website pricing. This allows us to provide the same pricing to everyone, and continue to offer free installation help to those able to get to our shop here in Denver, Colorado. If that is not a possiblity for you, we’ll follow up with the additional shipping costs once we’ve received your order.
Tower locations
4th gen 4Runners are 2003-2008 model years in the US, similar to the Lexus GX470 and Prado 120 series Land Cruiser worldwide. 5th gen 4Runners are 2009-present, with similarities to the GX460 Lexus and Prado 150. Roof racks are different with some unique dimensions, though each share the same limitation found on every 4Runner: the lack of towers.
Yes that means your 4Runner only has 2 attachment points per side. The same year Lexus has 3, and the same year Land Cruiser has 4… but you were given only 2. What that means is you have fewer points of contact between the rack system and the structure of your roof, and as such you are limited to 4 M8 threaded inserts per side, allowing for 2 towers per side to bolt up.
On 4th gen 4Runners you technically have a back and front tower, but lack a middle tower. For these racks, we provide an additional mounting plate in the center, and suggest you add a 3rd tower to the center of your rack to better support the load of your rack and gear.
On 5th gen 4Runners you technically have a back and middle tower, but lack a forward tower. For these racks, we provide an additional mounting plate in front, and suggests you add a 3rd tower to the front of your rack to better support the load of your rack and gear. We can also add a 4th set of plates between the rear towers and existing middle towers, to provide another middle support.
Here are the exact tower locations that we use on a 5th Gen 4Runner. Follow this guide, and your forward holes will be in a great location for drilling.
The rear and middle towers are “shifted back,” so using alternating slots putting the towers behind the centerline. Do this so it is symmetrical on both sides, the passenger side is shown below. On the front and middle towers, use the outer set of slots in the tower base for a wider stance.


Installing additional towers
The addition of towers is best done by drilling holes, and either tapping threads or installing riv nuts into your roof. This fastener solution is easy to do, it doesn’t leak, and it holds well… however it comes with the willingness to drill holes into your truck. We realize not everyone is up for that. We feel this is the best way to attach a rack to the roof, compared to long channels that either span the gap or cantilever forward, or using attachments that are merely taped to the roof.
The process is actually quite simple- we’ll give you the main steps, but first let’s point out the obvious here that this is 100% on you- like every product we offer, we’re not liable for your ability to install them, and you take full responsibility and ownership here. Ok now that we have that understood here are the basic steps:
Disconnect the vehicle battery. While unlikely, if you were to nick a wire inside the roof, hit an air bag, this project becomes much larger than adding a couple little holes. So if you’re feeling uneasy here, have a qualified shop install this.
install the rack using the existing threaded holes in the roof, tighten the rack to the towers, then position the new tower in the desired location and mark the new hole locations. You just need to land in the slot somewhere, and can center it in the channel when you get the punch out.
Remove the rack, then with a punch make a detent in the middle of the roof channel, where your marks are.
Drill the holes. Our tip here is get 2 step drills, and grind one of them off (see pic below). You’ve got a little more than 1” of space between the roof channel and the head liner, so if you use just one step drill to get all the way up to 7/16” the tip of it could go through. So we switch it up with a second drill bit, drilling the starter holes with one, then using the second to achieve the final hole size.
Also it’s a great tip to get a flashlight and peek down into the hole when it’s still small, make sure there isn’t anything below it, like a roof cross member or wire. You can pick a new slot in the tower if you do see something, and you’ll have a smaller hole to fill in over the impeding item.


Kyle’s review
Read what Kyle has to say about his rack, after a full year of ownership https://trail4runner.com/2022/08/19/gamiviti-roof-rack-5th-gen-4runner-review/

installation video
Watch our video to see a detailed installation on a 5th gen 4Runner, with inserts from a 4th gen install also.
The racks you see in this gallery have had the additional towers added.